Diferencia entre revisiones de «QSG kibox2A/en»
De wiki.kiconex
Página creada con «QSG kibox2A» |
Actualizando para coincidir con nueva versión de la página fuente |
||
| (No se muestran 10 ediciones intermedias de 2 usuarios) | |||
| Línea 1: | Línea 1: | ||
= KiBox2 Quick Start Guide = | |||
The kiBox has been designed as a plug & play IoT device, thus facilitating their installation. | |||
In this guide, the user will find simplified information to get their kiBox2A up and running and start working with it. | |||
== Hardware and dimensions == | |||
In this [https://wiki.kiconex.com/index.php?title=TSP_kibox2A link] you have the product specifications. | |||
== Hardware Installation == | |||
Follow the following steps to start up the KiBox2A: | |||
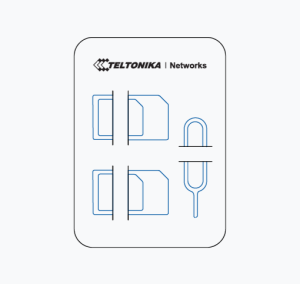
* Locate the SIM adapter kit. | |||
[[Archivo:Kit SIM.png|centro|miniaturadeimagen|SIM kit]] | |||
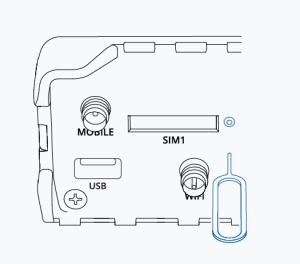
* Press on the button that releases the SIM card holder. | |||
[[Archivo:Sacar SIM.png|centro|miniaturadeimagen|Press SIM button]] | |||
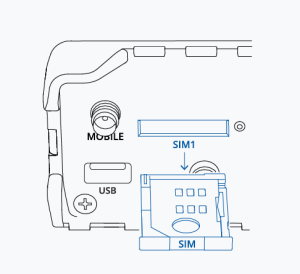
* Take out the SIM card holder. | |||
[[Archivo:Sacar tarjetero.png|centro|miniaturadeimagen|Taking out card holder]] | |||
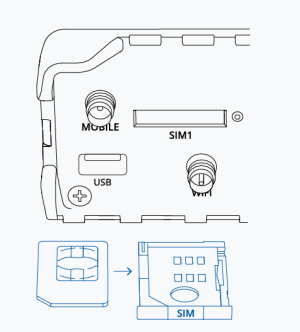
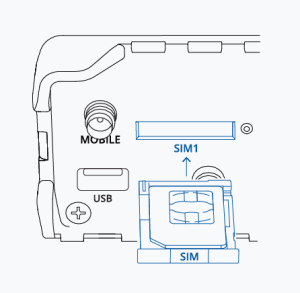
* Place the SIM in the card holder. | |||
[[Archivo:Colocar SIM.png|centro|miniaturadeimagen|Placing SIM]] | |||
* Reinsert the SIM card holder. | |||
[[Archivo:Introducir tarjetero.png|centro|miniaturadeimagen|Inserting card holder]] | |||
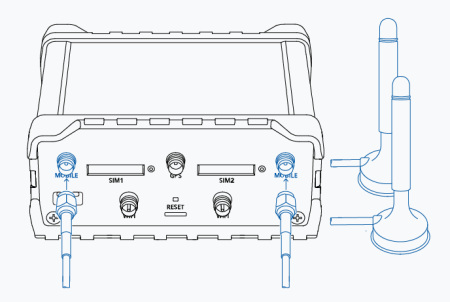
* Connect the main and auxiliary mobile antennas to the connectors labeled "MOBILE." | |||
[[Archivo:Conectar antenas.png|centro|miniaturadeimagen|450x450px|Connecting main and secondary antennas]] | |||
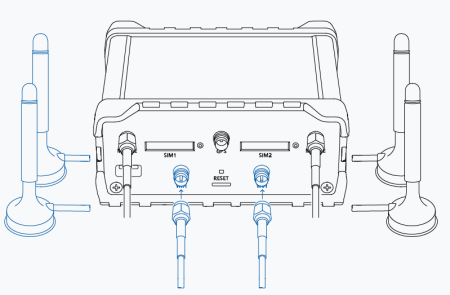
* Plug the WIFI antennas into the connectors labeled "WIFI". | |||
[[Archivo:Conectar antenas WIFI.png|centro|miniaturadeimagen|450x450px|Connecting WIFI antennas]] | |||
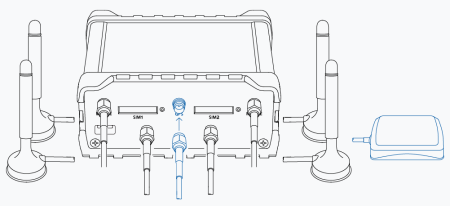
*Connect the GPS antenna to the connector labeled "GPS" | |||
[[Archivo:Conectar antenas GPS.png|centro|miniaturadeimagen|450x450px|Connecting GPS antennas]] | |||
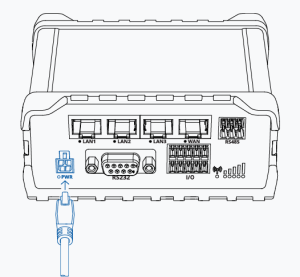
* Finally connect the power cable to the front panel. | |||
[[Archivo:Conectar a corriente.png|centro|miniaturadeimagen|Connecting to power]] | |||
After all these steps, connect to the wireless network offered by the KiBox2A and enter the IP "192.168.1.1" to access its interface. | |||
Revisión actual - 05:14 28 ago 2024
KiBox2 Quick Start Guide
The kiBox has been designed as a plug & play IoT device, thus facilitating their installation.
In this guide, the user will find simplified information to get their kiBox2A up and running and start working with it.
Hardware and dimensions
In this link you have the product specifications.
Hardware Installation
Follow the following steps to start up the KiBox2A:
- Locate the SIM adapter kit.
- Press on the button that releases the SIM card holder.
- Take out the SIM card holder.
- Place the SIM in the card holder.
- Reinsert the SIM card holder.
- Connect the main and auxiliary mobile antennas to the connectors labeled "MOBILE."
- Plug the WIFI antennas into the connectors labeled "WIFI".
- Connect the GPS antenna to the connector labeled "GPS"
- Finally connect the power cable to the front panel.
After all these steps, connect to the wireless network offered by the KiBox2A and enter the IP "192.168.1.1" to access its interface.
