In a conventional facility with Modbus RTU communication, all devices have to be wired directly to the Modbus master (''kiBox'') using a 2-wire shielded cable. This connection is made using daisy-chain connection type. It can be seen in more detail in this
In a conventional facility with Modbus RTU communication, all devices have to be wired directly to the Modbus master (''kiBox'') using a 2-wire shielded cable. This connection is made using daisy-chain connection type. It can be seen in more detail in this
Translated with DeepL.com (free version)
The ''KiWi'' solution allows to transform the modbus RTU communication to a wireless modbus TCP/IP connection. In this way, the local WiFi network of the facility can be used to connect the different control-devices. In addition, since the ''KiWi'' device also has an RJ45 port, it can also be connected to the local Ethernet network via Ethernet cable through the RJ45 connector.
The ''KiWi'' solution allows to transform the modbus RTU communication to a wireless modbus TCP/IP connection. In this way, the local WiFi network of the facility can be used to connect the different control-devices. In addition, since the ''KiWi'' device also has an RJ45 port, it can also be connected to the local Ethernet network via Ethernet cable through the RJ45 connector.
Example of a conventional installation with Modbus RTU communication:
Example of a conventional installation with Modbus RTU communication:
Example of an installation via Modbus RTU using the ''KiWi:'''
Example of an installation via Modbus RTU using the ''KiWi:'''
[[Archivo:SP - ESQUEMA CONEXIONES KIWI.jpg|centro|miniaturadeimagen|800x800px|Esquema de conexionado kiWi]]
[[Archivo:SP - ESQUEMA CONEXIONES KIWI.jpg|centro|miniaturadeimagen|800x800px|Esquema de conexionado kiWi]]
Revisión del 11:25 22 mar 2024
kiWi
kiWi (or ki'conex wi'reless) is our solution for transforming controls with modbus RTU communication to modbus TCP/IP communication. This communication allows to connect devices wirelessly to the local ethernet network of the installation where the main kiBox is located.
Description of the kiWi solution === ===
In a conventional facility with Modbus RTU communication, all devices have to be wired directly to the Modbus master (kiBox) using a 2-wire shielded cable. This connection is made using daisy-chain connection type. It can be seen in more detail in this
The KiWi solution allows to transform the modbus RTU communication to a wireless modbus TCP/IP connection. In this way, the local WiFi network of the facility can be used to connect the different control-devices. In addition, since the KiWi device also has an RJ45 port, it can also be connected to the local Ethernet network via Ethernet cable through the RJ45 connector.
Example of a conventional installation with Modbus RTU communication:
Simple RS-485 schematic
Example of an installation via Modbus RTU using the KiWi:'
Esquema de conexionado kiWi
It should be noted that in a kiWi up to a maximum of two equipments can be connected and the conditions that must be met are:
Not to exceed 800 parameters between the two devices.
To be able to work with 9600bps speed.
Technical characteristics
(360 MHz)
RED
WiFi
Ethernet
1xETH
Modbus
Modbus Protocols
9600
Data bits
8
Stop bits
1
Parity
Duplex
Supported data formats
System'
CPU
RAM
520 KiB
Flash memory
4 MB
Connector
Supply voltage
5 VDC
Power consumption
< 5 W
Temperature range
Material'
Material
Dimensions
95x30mm
100 g
Configuration of the KiWi
Default configuration:
WiFi: KIWI_XXXXXXXXXX
WiFi Password: 12345678
IP configuration portal: 192.168.4.1'
Portal password: 12345678
RS485 Port Connection
Parts of KiWi'
Partes de un KiWi
RS485 port
5V power supply
ON/OFF indicator light
Ethernet port
Reset button
RS485 port
Numeración de las bornas en un KiWi
PIN
USE
1
2
3
A (+)
4
B (-)
Before you start
Configuration parameters
WiFi network SSID
WiFi network password
Free IP for the kiwi
Gateway
Netmask
DNS1 and DNS2
Operating Notes
KiWi creates its own WiFi network, of type KIWI_58AEB3J2, in the following cases:
Not configured
Wrong configuration
Network disconnected
If you have already configured the KiWi , you can access it by connecting to the same network and typing its IP in the browser.
Versions prior to v1.3.5 only support Modbus RTU 9600 baud 8N1 and Modbus TCP communications through port 502.
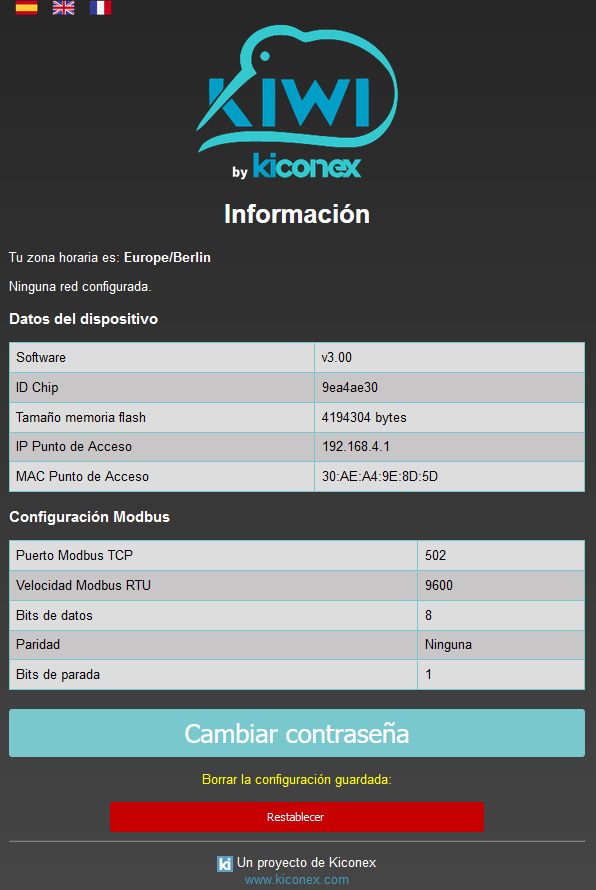
You can check the version in the information window of the KiWi web portal.
Access to the KiWi configuration portal
Access to KiWi not configured
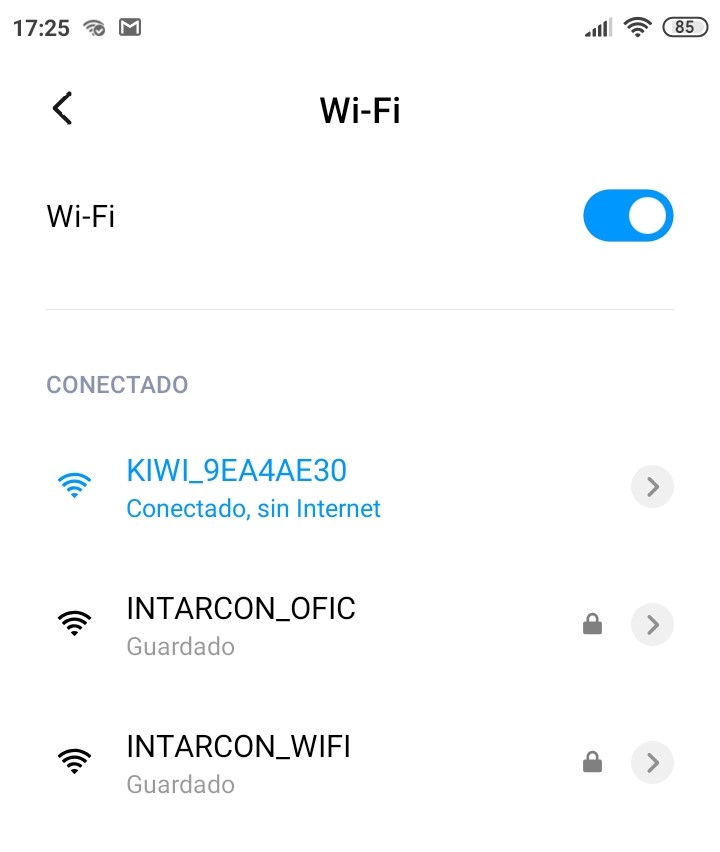
Connection to KiWi WiFi network from smartphone.Ejemplo de visualización de la red wifi del kiwi
If you have not been redirected to the configuration portal you must open Chrome, Firefox or similar browser.Navegadores
Access the IP 192.168.4.1
Acceso a KiWi por IP
Access to KiWi already configured
The process of the previous section is repeated, but in this case it is necessary to connect to the same WiFi network that was configured in the KiWi , and the IP to enter in the browser is the IP that was configured in that kiwi.
KiWi configuration
Parts of KiWi
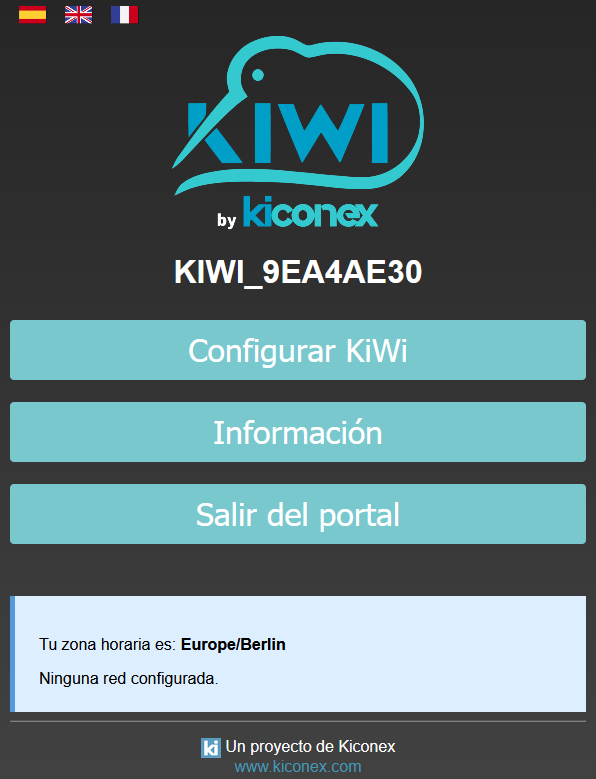
Access by password (at the first access you will be redirected to a portal to enter a secure password)Ventana principal del portal en configuración del KiWi
Main window of the portal. Click on Configure KiWi/Change configuration, to start.Ventana principal del portal en configuración del KiWi
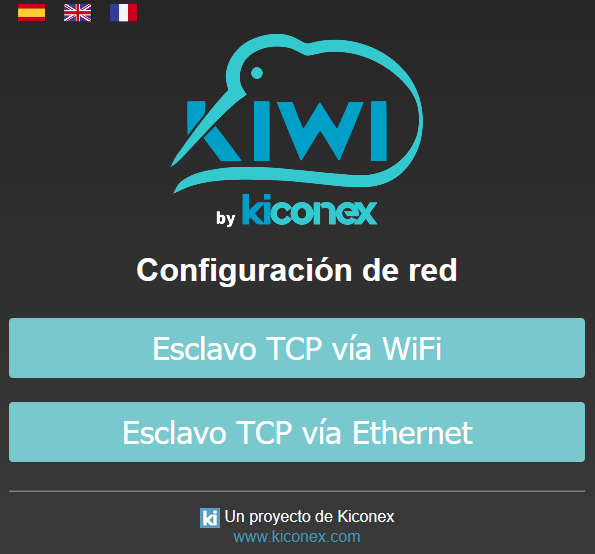
Selection of the connection mode. Possibility of wireless or wired connection.Opciones de red en configuración del KiWi
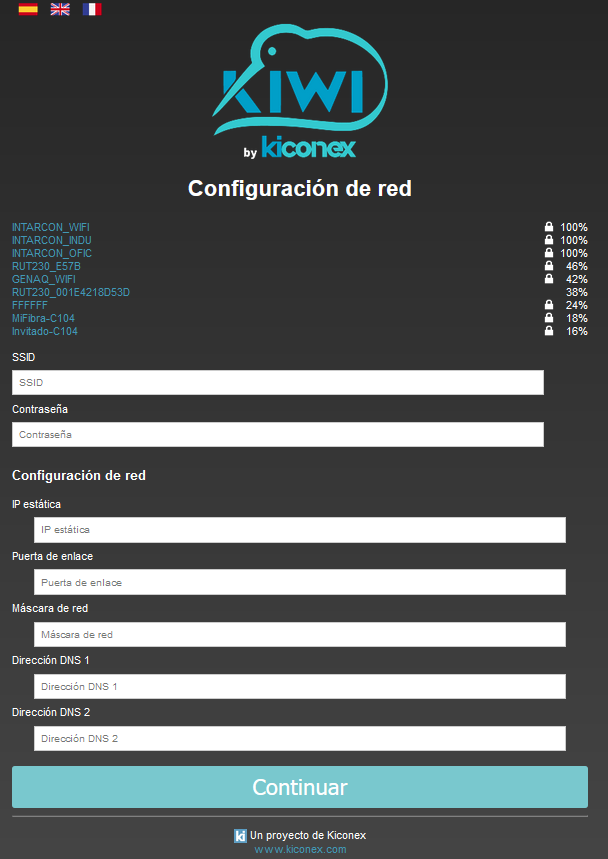
Network configuration. Indicate WiFi and password to connect to and indicate the necessary parameters.Configuración de red en configuración del KiWi
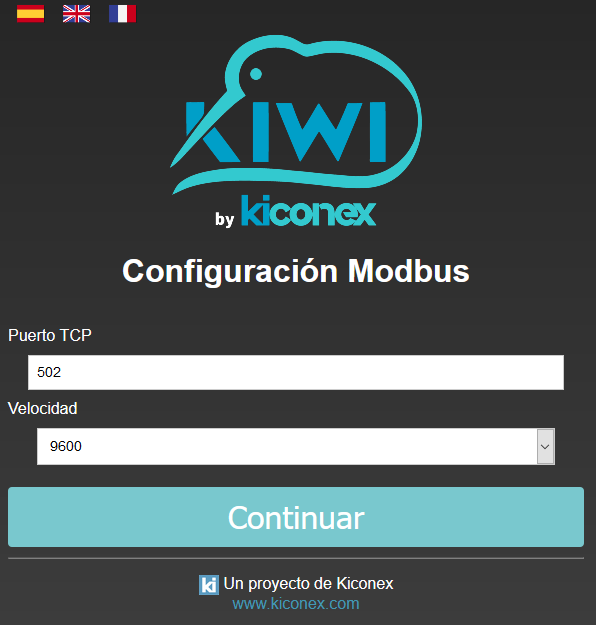
Modbus configuration input. Indicate Modbus RTU communication speed and port for Modbus TCP communication. Configuración RS-485 en configuración del KiWi.
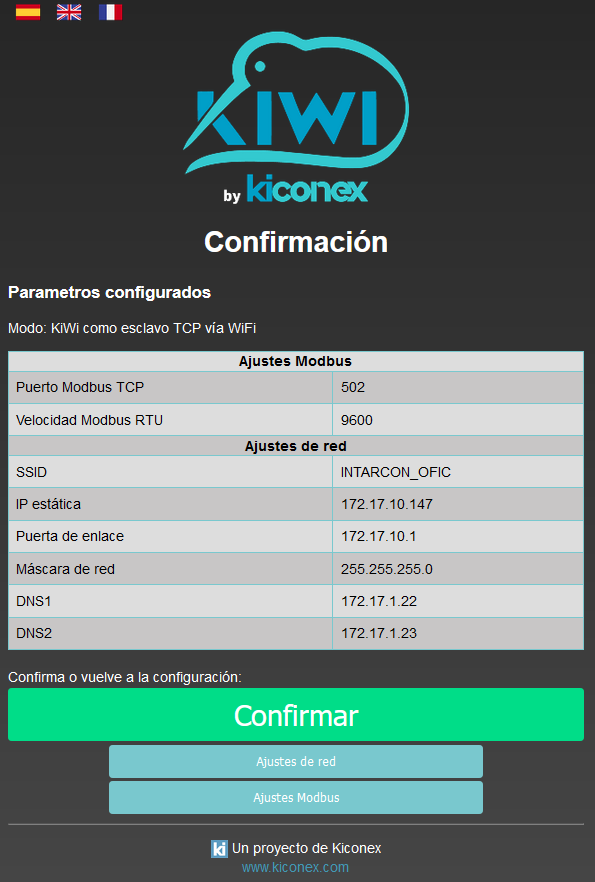
Confirmation of entered parameters. If you want to change any of them, you can go back. Confirmación de la configuración RS-485 en configuración del KiWi.
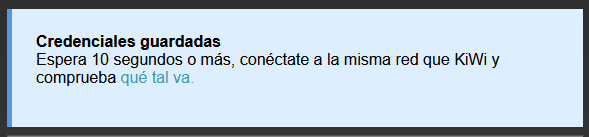
End of configuration. Fin de la configuración en configuración del KiWi
If during the life of the KiWi , the network to which it is connected is modified, it will be necessary to reconfigure KiWi for the new parameters that characterize the network.
When KiWi has problems connecting to a network, it continuously retries by keeping its WiFi access point open when accessing to verify its configuration and change it if necessary.
Deletion process
If you need to delete the configuration set in KiWi , you can do it in two ways:
If you have access to the configuration portal, at the end of the information window there is a deletion option: Proceso de borrado del KiWi.
In case you do not have access to the portal, you can delete the configuration manually through the reset button located in the hole on the top cover of the KiWi. It is necessary to insert a very narrow element and hold down the button for about 10 seconds.
Botón de reset del KiWi
You can download the manual from the following link