CheckWiring/en
Checking the RTU-RS485 modbus wiring
Modbus RTU-RS485 wiring should be checked after start-up of the facility and when starting to visualize communication problems on the platform.
You can consult how to make the Modbus RTU-RS485 Connection by clicking on the {SERVERNAME}}/index.php/Special:MyLanguage/ModbusRTU-RS485 link.
If there are errors, with the help of the graphs, you can have a first visualization of these errors. It is possible that only points are displayed, intermittent cuts, false connections in the control (the control appears as connected even though it is not recording data), intermittent disconnections of the controls on the platform, loss of readings on one bus or several, among others.
Below are some graphs where these intermittent communication failures are identified.


Medición de los buses
Los puntos que se deben tener en cuenta para las comprobaciones son las siguientes:
Polarities
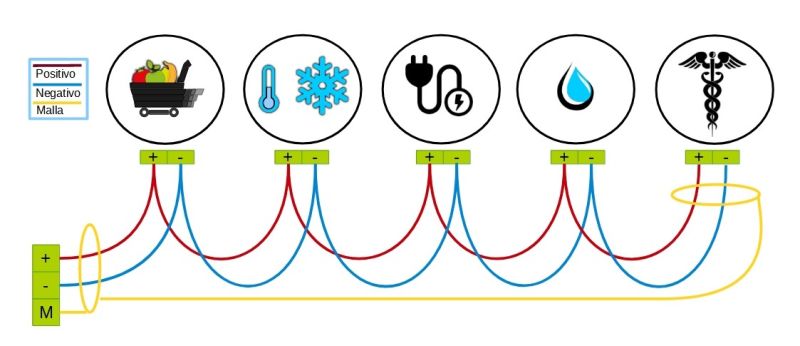
The polarities are those strictly used in the modbus protocol RTU using the Daisy-chain typology described in the wiring requirements.

The polarities must be connected to each other using the terminal block of the kiconex panel or kiBox as the start or end of the line, never connecting to the monitored machines or deviced. If the mesh is connected to a machine, the voltage it may have may end up being induced in the communication bus creating electrical noise and conflicts on it, including breaking ports on the kiBox.
Voltage
Voltages in alternating current and direct current must be measured with the help of a multimeter.
The measurements must be made directly on the bus, so the entire bus (positive, negative and mesh) must be DICONNECTED obligatory from the terminal block or from the kiBox if it does not have a panel.
It must be measured between positive-negative, positive-mesh and negative-mesh, both alternating and continuous.
MUST NOT HAVE ANY ALTERNATE VOLTAGE.
In continuous it can possibly have up to 1 Vdc due to the communication flow.
En caso de tener corriente alterna se debe identificar el equipo que está induciendo esta tensión en el bus y revisar el cableado que esté en condiciones óptimas.
La siguiente tabla puede facilitar la recopilación de datos sobre las mediciones:
Continuidad
Se debe medir continuidad entre positivo-negativo, positivo-malla y negativo-malla, siendo esta INEXISTENTE.
En caso de tener continuidad, se debe identificar el contacto que está provocando esta continuidad y subsanar la incidencia.
A tener en cuenta
El bus de comunicación debe estar alejado del cableado de fuerza ya que esto puede producir ruido, se debe tener en cuenta también las conexiones dentro de su equipo monitorizado.
El bus con tensión NO se debe conectar al bornero del cuadro o al kiBox, esta acción puede derivar en avería del kiBox. En caso de que se realice una sustitución se deben comprobar los buses antes de conectarlos.
Una vez saneados los buses y aisladas las máquinas problemáticas tendrá una visualización correcta de las lecturas de los equipos monitorizados sobre la plataforma.


