QSG kibox1A/en
De wiki.kiconex
KiBox0 Quick Start Guide
The kiBoxes have been designed as plug & play IoT devices, thus facilitating their installation.
In this guide, the user will find simplified information to get their kiBox0 up and running and start working with it.
Hardware and dimensions
In this link you have the product specifications.
Hardware Installation
Follow the following steps to start up the KiBox1A:
- Unscrew the screws on the back panel and remove the case.
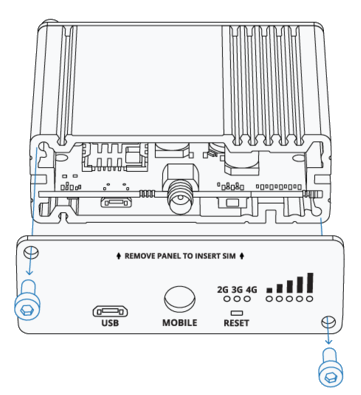
- Once the back panel is removed, we will see the SIM card holder, which we will insert into it.
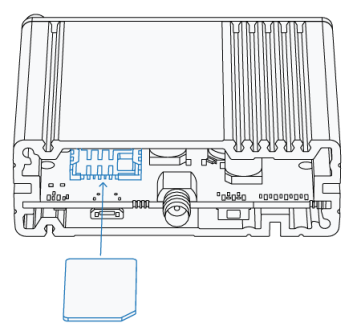
- We screw the back panel again to continue with the installation.
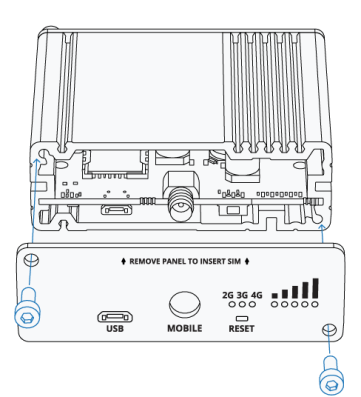
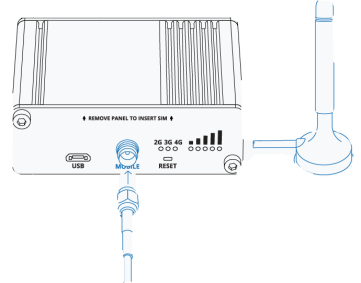
- Conecte la antena al conector en el que indica "MOBILE"
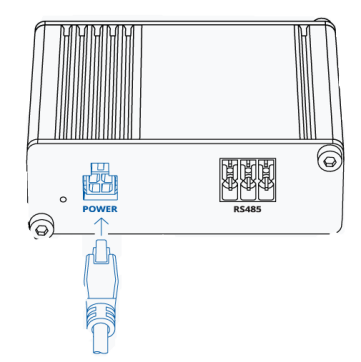
- En el panel frontal, conecte el conector de 4 pines de alimentación.
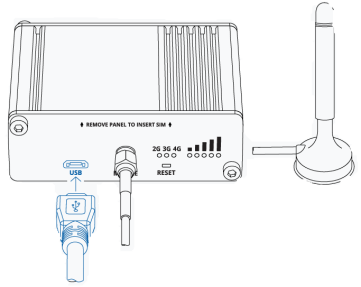
- Conecte el conector microUSB al puerto que indica "USB".
Con este ultimo paso realizado, conectaremos el otro extremo del USB a nuestro ordenador, el cual en el "Administrador de dispositivos" detectara el dispositivo e instalara los drivers necesarios.
El siguiente paso seria introducir la ip "192.168.2.1" para entrar a la configuración del KiBox1A

