Notifications/en
Alarm Notification
Email notifications
Those facilities with email notifications included in their plan will be able to activate the alarm notification functionality by sending an email to one or more users.
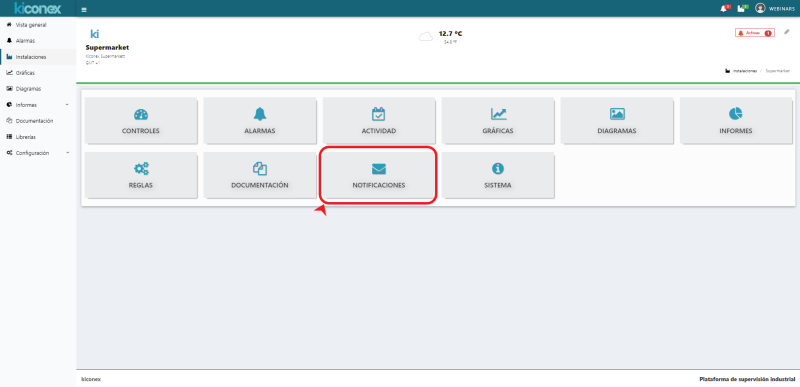
To configure the notifications, it is necessary to access the NOTIFICATIONS tab within the facility, as shown in the following images:
Before configuring the notifications, it is necessary to categorize the alarms as indicated on the alarm configuration page.
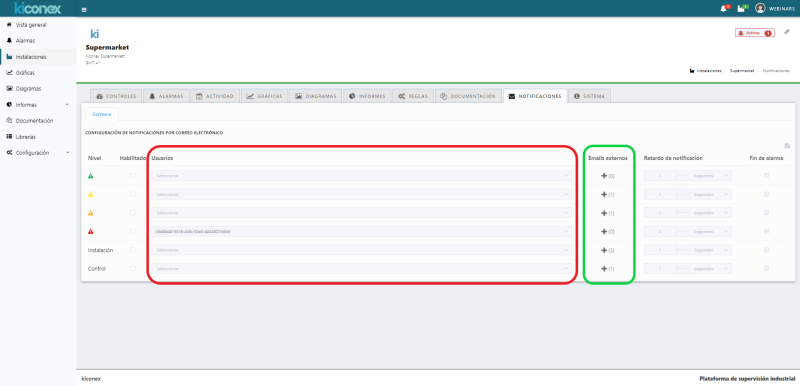
Once this preliminary point has been made, the notifications for each alarm level can be activated. The meaning of each line is as follows:
- Green triangle: When an alarm categorized as "light alarm" is activated, users included in this row will be notified of thas alarm.
- Yellow triangle: When an alarm categorized as "medium alarm" is activated, users included in this row will be notified of that alarm.
- Orange triangle: When an alarm categorized as "serious alarm" is activated, users included in this row will be notified of that alarm.
- Red triangle: When an alarm categorized as "critical alarm" is activated, the users included in this row will be notified of that alarm.
- Facility: When the kiBox loses connection with the server (loss of internet connection), the users included in this row will be notified of such alarm.
- Control: When any of the controls of the facility loses communication with the kiBox through the fieldbus, the users included in this row will be notified of this alarm.
For each of the above alarm categories, you can add as many users existing in the platform, through the column "Users" (red box), as external e-mails to the platform, through the "+" button "External e-mails" (green box).
Notification of the event can be delayed as indicated in the "Notification delay" column. In this sense, if this event occurs, the system does not send the notification immediately, but waits for the indicated time. If after this time the event is still active, the system does send the notification. This delay is very useful to ignore false alarms that last only a few moments in time, such as momentary disconnections due to Internet outages.
The last column "End of alarm" can be activated if we want the system to notify us once the alarm has disappeared.
Configuration of external e-mails
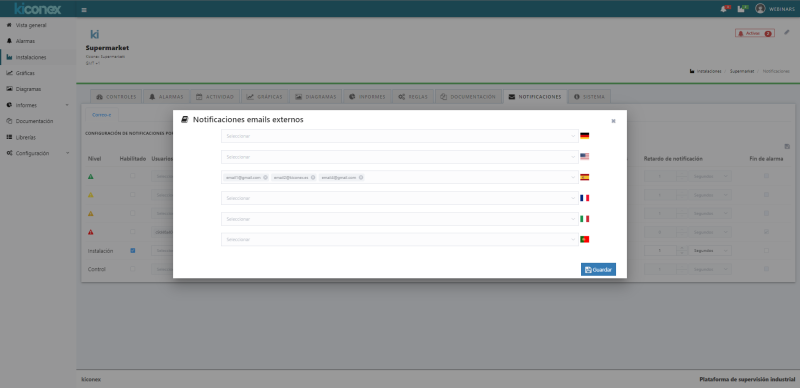
The following is an example of how to configure external e-mails on the platform.
Para poder añadir un correo electrónico, primero se debe habilitar el nivel correspondiente (columna habilitar) (rojo) del que se quiera enviar la notificación, y luego pulsar el botón “+” (verde):
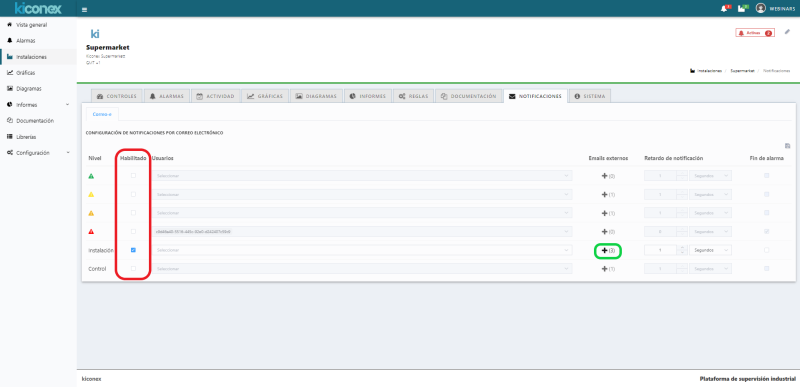
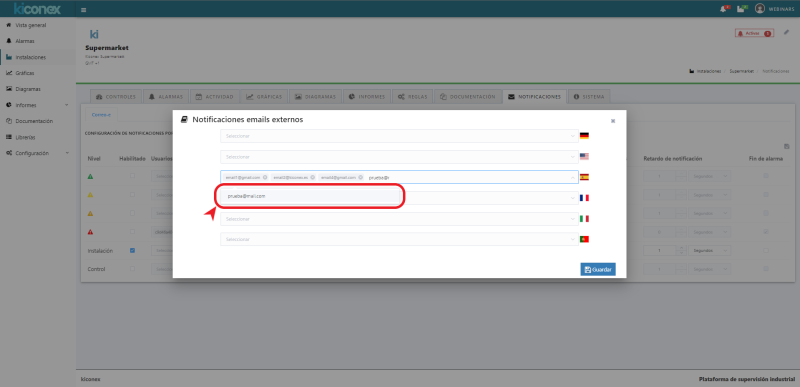
En esta ventana, se podrán añadir tantas direcciones de correo como se desee. Para que la adición del email sea efectiva debe hacer clic sobre el texto del email que aparece en el desplegable:
- Las notificaciones se envían en el idioma de la celda en la que se introduzca.
- Se pueden introducir tantas direcciones como se desee.
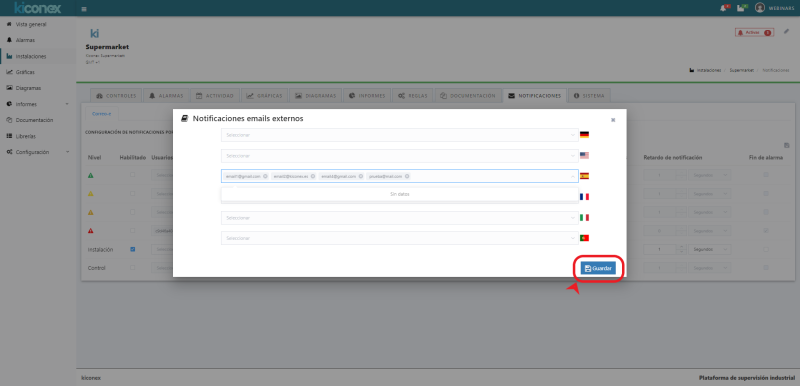
- Una vez configurados todos los emails que se deseen, pulsar en el botón “Guardar” para guardar los correos externos.
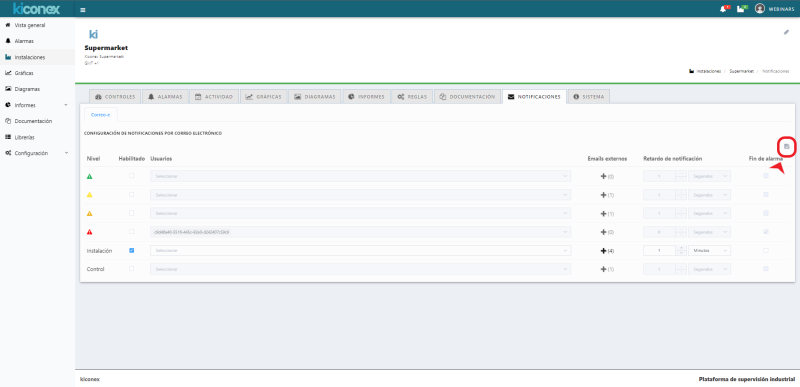
Tras guardar los correos, configurar el tiempo de retardo de notificación, y el método de aviso. Para aplicar los cambios, es necesario hacer clic en el símbolo del disquete de la esquina superior derecha:
Notificaciones por SMS
En aquellas instalaciones que estén suscritas a un plan con envío de notificaciones de alarmas mediante SMS le aparecerá la siguiente pestaña dentro de la sección "notificaciones".
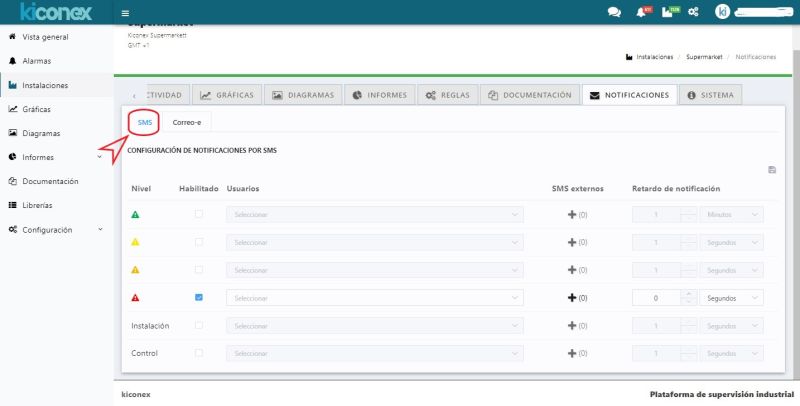
En dicha pestaña se pueden configurar rápidamente los diferentes niveles de alarmas de los controles así como las alarmas de desconexiones de los controles y de los kiBox (instalación). El proceso es igual al descrito en notificaciones por email. La diferencia es que sólo aparecerán los usuarios que tengan un número de teléfono configurado en su perfil y que no se permite la notificación de fin de alarma por SMS.
Configuración de SMS externos
Para notificar a una alarma mediante SMS a una persona que no tiene cuenta en myKiconex, se debe pulsar sobre el signo + de la columna "SMS externos". En tal caso le aparecerá la siguiente ventana emergente:
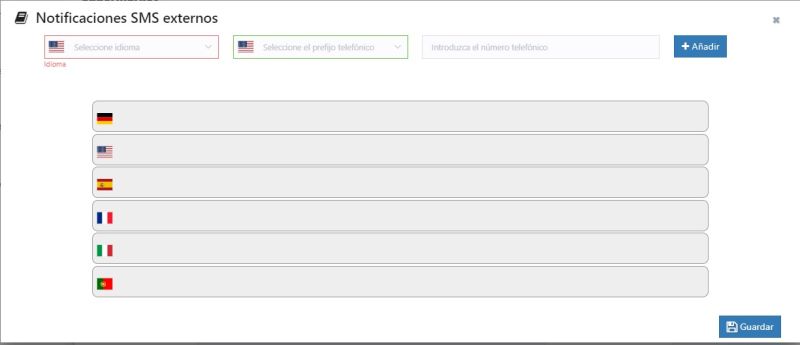
Para añadir un número de teléfono para enviar la notificación se debe de seguir los siguientes pasos:
- Seleccionar el desplegable del idioma en el que se quiere comunicar la notificación.
- Seleccionar el prefijo del número de teléfono acorde al país de destino.
- Insertar el número de teléfono a notificar de la alarmas.
- Pulsar sobre el botón "añadir".
De está forma, el número de teléfono aparecerá en la fila del idioma elegido para notificar a ese usuario. Este proceso se puede repetir para añadir más usuarios a notificar en caso de activación de esta alarma. Finalmente, es necesario pulsar el botón "guardar" para que todos los cambios queden registrados en la plataforma.

