QSG kiBox/en
De wiki.kiconex
KiBox2-4 Quick Start Guide
kiBox have been designed as plug & play IoT devices, thus making their installation easy.
In this guide, the user will find simplified information to get their kiBox2-4 up and running and start working with it.
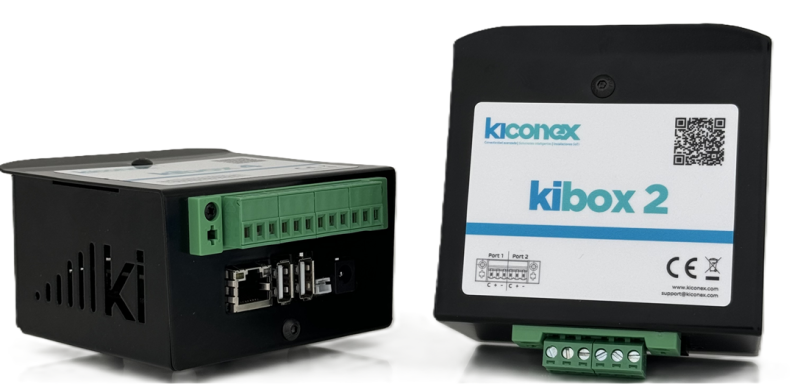
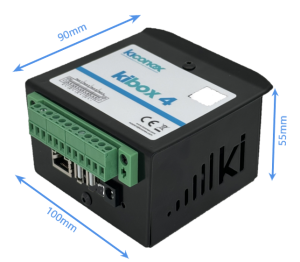
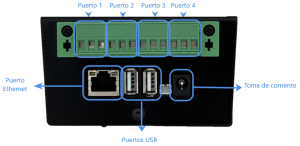
Hardware and dimensions
Hardware Installation
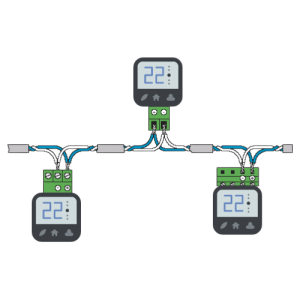
- Before working with kiBox, it is necessary to prepare the installation of the controllers that will be connected to it. The controllers must be connected to each other in cascade (as shown in the image) and directed to the RS485 ports of the kiBox according to the daisy-chain topology. Use a 3-wire shielded cable.
Note: Do not make derivations or close the circuit.
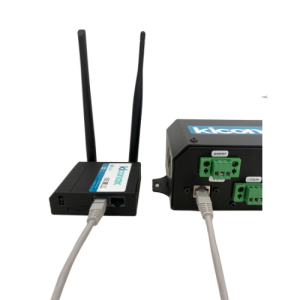
- Conecte el cable RJ45 desde el puerto Ethernet del kiBox2 hasta el puerto Ethernet LAN del router.
Nota: cable RJ45 no incluído, opcional de añadir a su pedido.
- Antes de realizar este paso, verifique por su seguridad que no hay conexión alguna de los instrumentos a la red eléctrica.
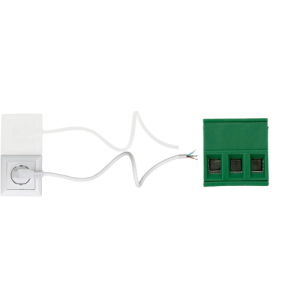
- Prepare el cable de alimentación: conecte fase, neutro y tierra (según lo detallado en la parte trasera de su kiBox) al adaptador de corriente de su kiBox (pieza derecha de la imagen).
- Conecte el adaptador de corriente a su kiBox.
- Conecte el otro extremo del adaptador de corriente a su toma de corriente.
- Presione el botón de encendido del kiBox para empezar.
- Acceda a nuestra página web https://my.kiconex.com, introduzca sus credenciales (es necesario un registro previo) y haga clic en acceder.
- Para continuar con la configuración de su instalación, acceda a Perfil de usuario o Instalaciones. Recomendamos la lectura de los demás apartados relacionados en MyKICONEX.

